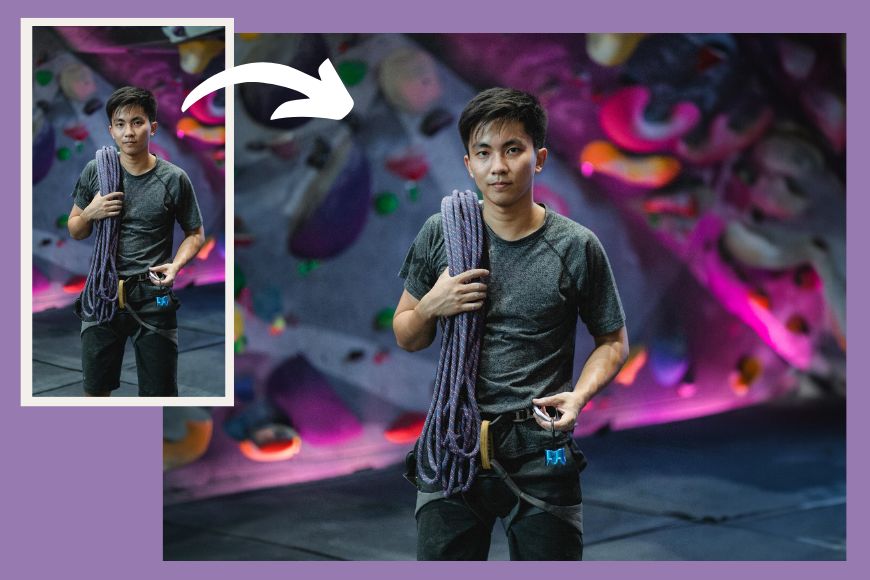
Did you know that you can use Photoshop Generative Fill to extend the background in your photos?
This is one of the most popular uses for Photoshop’s Generative AI tools.
In this article, I’ll explain how to extend a background using Generative Fill and when it can be useful.
Are you ready? Let’s get started!
How to Extend a Background in Photoshop Generative Fill
One of the most common uses of the Generative Fill tool in Photoshop is to extend a picture’s background. Not only is it a very useful edit, but it’s also extremely easy to use.
Here’s how.
Step 1
Open your image in Photoshop. The floating taskbar shows the Select Subject and Remove Background options.
If you enable the Crop tool by clicking its icon on the toolbar or pressing the letter C on your keyboard, the taskbar changes the available task to Generative Expand.
Step 2
To expand the background freely, click and hold any of the corners or the handles of the crop frame. Then, drag it outwards until you reach the desired size.
Step 3
If the Fill is set to Generative Expand on the Options bar, you can simply apply the crop, and Photoshop will generate the required content.
If Fill is set to Transparent or Content Aware, you need to change it to Generative Expand. You can do this using the drop-down menu on the Options bar or by clicking Generative Expand on the floating taskbar.
Then, apply the crop and let Photoshop do its magic.
Step 4
On the Properties panel, you’ll find three variations from which you can choose. If none fits your needs, you can click the Generate button on the Properties panel to get another three.
Step 5
The Generative Fill tool in Photoshop creates a new layer because it’s a non-destructive edit. So, your original remains untouched on the background layer.
Once you’re satisfied with the result, you can go to the menu Layers > Flatten Image to merge the new layer with the background layer.
When to use Generative Expand in Photoshop
Everything sounds nice in theory, but it’s only valuable if you can give it a practical use. So, here are some situations where you might want to extend a background using Photoshop Generative Fill.
Change the photo orientation
Credit: İlkin Efendiyev
The Generative Expand tool can transform a landscape-oriented photo into a portrait-oriented one or vice versa without losing resolution.
Simply follow the steps from the previous section and change which side is the longer one.
Change the aspect ratio
Credit: TMS Sam
Another popular reason to expand a background in Photoshop is to change the aspect ratio.
There are many situations in which you might want to do this. Perhaps you have a square photo because you used it on Instagram, but now you want to use it as a cover photo.
How Much Do You REALLY Know About Photography?! 🤔
Test your photography knowledge with this quick quiz!See how much you really know about photography…
Start Quiz
Your answer: Correct answer: Next
You got {{SCORE_CORRECT}} out of {{SCORE_TOTAL}}
Or, your camera sensor’s aspect ratio may be different from the one required by the template you’re using on your website.
Whatever the reason, you can easily change the aspect ratio using the Generative Expand tool. Simply click the Ratio button on the floating toolbar and set it to the one you want. You can also do this in the Options bar.
Now, dragging the handles from the crop bar will maintain the aspect ratio you set.
Recompose
Credit: Adrianna CA
If you want to improve the composition of your image, you can use the overlays available on the Crop tool. To enable them, click on the dedicated icon in the Options bar.
You can toggle between overlays by pressing the letter O on your keyboard. To rotate them, hold the Shift key and press the letter O.
Once you’ve found the ideal overlay, drag the Crop handles until you’re happy with the new composition. Then, set the Fill option to Generative Expand and apply the crop.
Photoshop will generate content to fill the empty areas.
Fix an involuntary crop
Credit: Wesley Davi
Have you ever taken a picture and realized you cropped it too tight? Maybe you were photographing your dog and didn’t include the entire ear, or you shot a portrait and cropped the tip of the shoe.
You have nothing to fear – Photoshop Generative Fill is here to help. Simply expand the background, and Photoshop will generate the content and finish what’s missing.
Keep in mind that AI tools still have problems generating things like fingers. So, if you need to complete a hand or a bare foot, it may take quite a few tries to get it right.
Straighten images and fill empty areas
Credit: Alesia Kozik
Last but not least, you can use the Generative Fill tool to extend the background after you’ve straightened the horizon on a photo.
The Crop tool has a Straighten option, which can be found in the Options bar and on the floating taskbar.
Once you enable it, click on one side of the horizon and drag the cursor to the other, following the horizon line.
As soon as you let go, Photoshop straightens the picture. Inevitably, this will leave empty areas in the corners. If Generative Expand is enabled in the Fill options, Photoshop will generate the required pixels to make the perfect edit.


